


")
")


")
Introduction
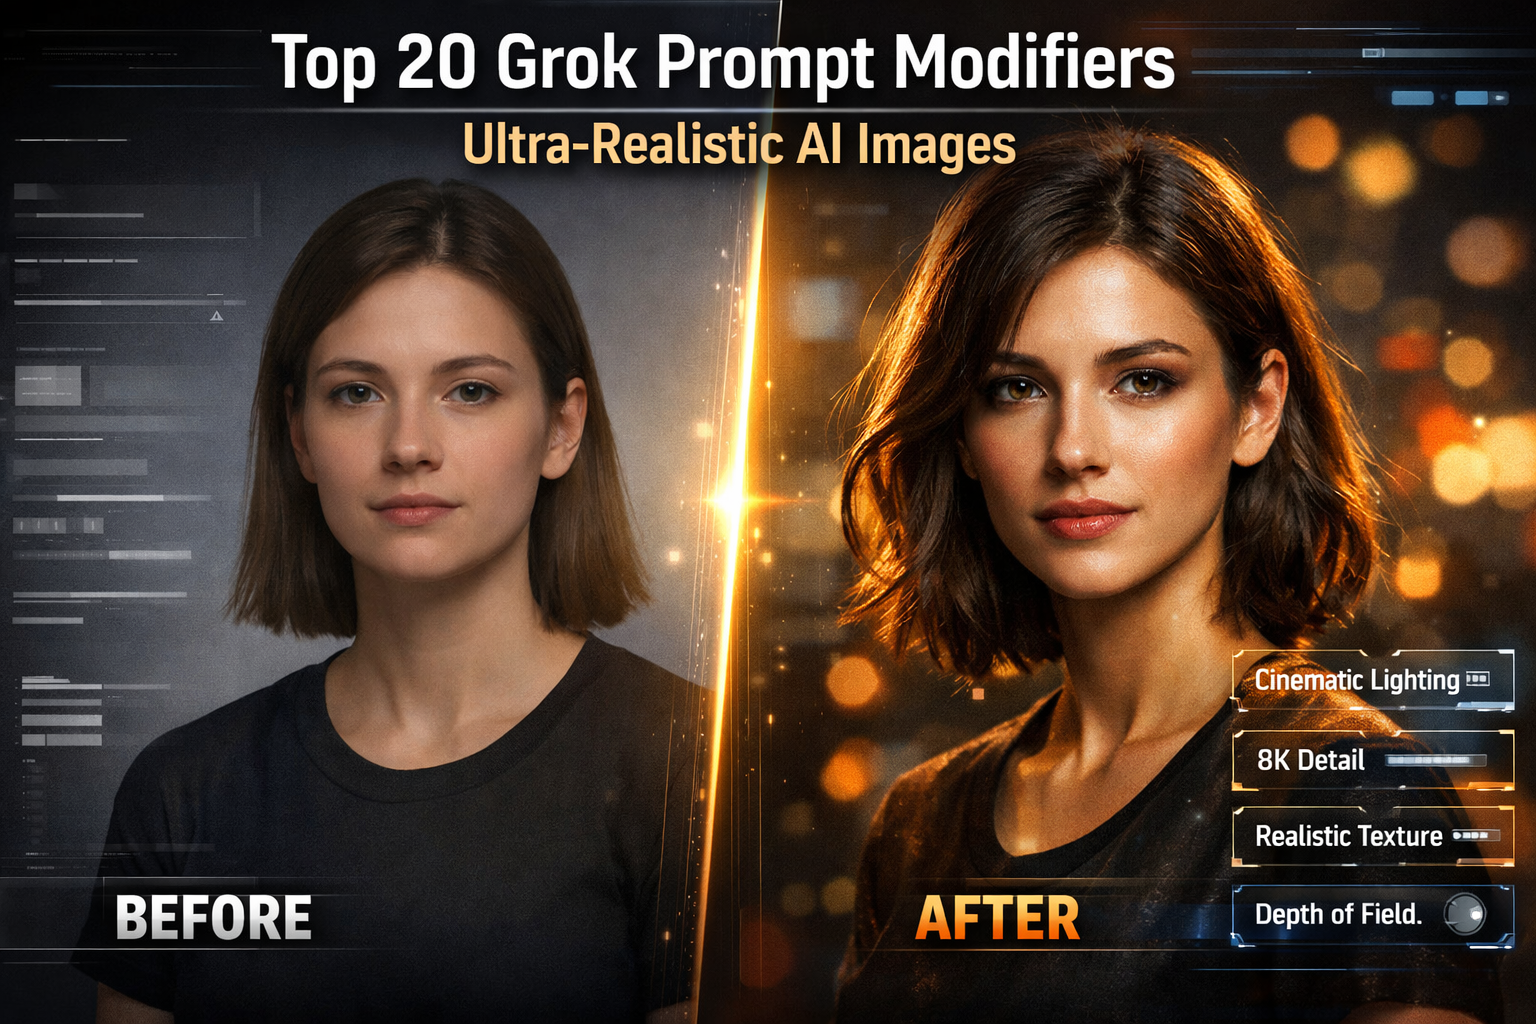
Creating realistic AI images with Grok goes far beyond writing a simple prompt. While basic prompts generate visuals quickly, they often lack depth, texture, and realism. This is where Grok prompt modifiers become essential.
Prompt modifiers are descriptive additions that guide Grok on how an image should look, not just what it should show. When used correctly, they dramatically improve lighting, composition, texture, and overall realism.
In this guide, you’ll learn 20 proven Grok prompt modifiers that professionals use to create ultra-realistic AI images. Whether you’re editing photos, designing visuals, or experimenting creatively, these modifiers will help you achieve consistent, high-quality results.
Grok is an AI-powered image generation and editing tool developed by xAI, designed to help creators generate and enhance visuals using natural language prompts.
Related Grok Guides
- 10 Advanced Grok Prompts for Stunning AI Image Effects (2026 Edition)
- 25 Best Grok Photo Editing Prompts
- How to create viral Grok AI TikTok videos
- Grok Prompts for Logo Design & Branding
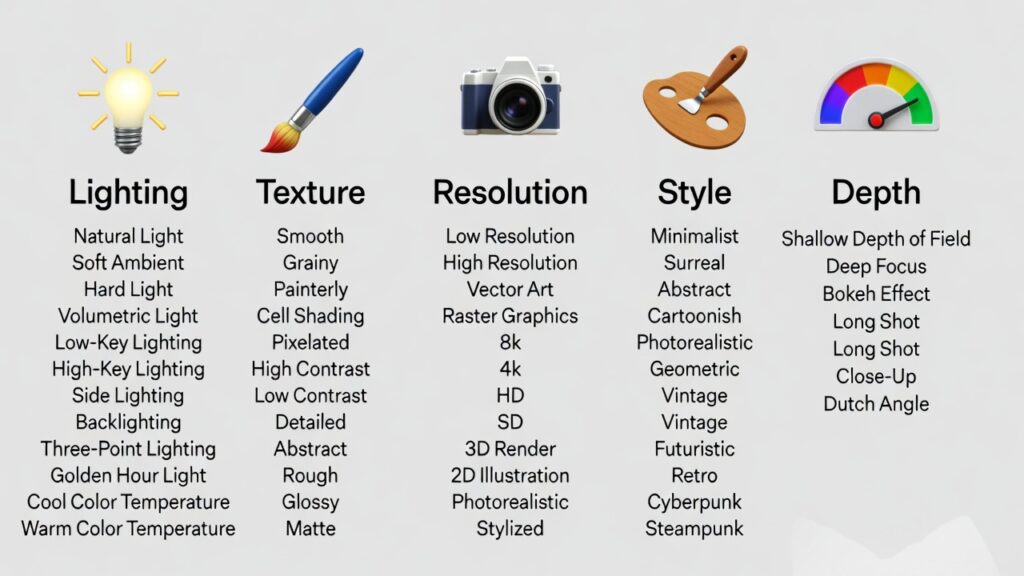
What Are Grok Prompt Modifiers?
Prompt modifiers are specific keywords or phrases added to a Grok prompt to control visual characteristics such as lighting, camera depth, texture, mood, and realism.
Prompt modifiers are descriptive additions that guide Grok on how an image should look, not just what it should show. For a detailed overview of AI prompt engineering, see
this guide by DeepLearning.AI.
For example, instead of writing:
“A portrait of a man”
You can write:
“A portrait of a man, cinematic lighting, shallow depth of field, ultra-realistic skin texture”
As a result, Grok understands the style, quality, and realism level you want to achieve.
Why Grok Prompt Modifiers Matter for Realism
Using modifiers helps you:
- Control lighting and shadows
- Improve facial details and textures
- Create natural depth and focus
- Avoid flat or artificial-looking results
- Produce professional, print-ready visuals
In short, modifiers turn simple prompts into production-level instructions.
Top 20 Grok Prompt Modifiers for Ultra-Realistic Images
1. Cinematic Lighting
Adds dramatic light and shadow effects similar to those found in film scenes.
Example:cinematic lighting, soft shadows, high contrast
Cinematic lighting adds drama and depth. For photography lighting tips that inspire realistic AI results, see
this Fstoppers guide.
2. Natural Light
Creates soft, realistic daylight effects.
Example:natural daylight, soft ambient lighting
3. Studio Lighting
Ideal for portraits and product images.
Example:professional studio lighting, controlled highlights
4. Ultra-Realistic
For maximum realism and detail.
Example:ultra-realistic, lifelike textures
5. Photorealistic
Helps images resemble real photography.
Example:photorealistic, real-world proportions
6. High Detail
Improves clarity and fine textures.
Example:highly detailed, sharp focus
7. 8K Resolution
Enhances sharpness and clarity.
Example:8K resolution, crisp details
Using 8K resolution ensures ultra-sharp, crisp images. Learn more about 8K standards and quality expectations here.
8. Shallow Depth of Field
Creates professional background blur.
Example:shallow depth of field, blurred background
9. Sharp Focus
Keeps the subject clean and clear.
Example:sharp focus, clear subject
10. Soft Bokeh
Adds pleasing background light blur.
Example:soft bokeh lights, smooth background
11. Realistic Skin Texture
Essential for portraits.
Example:realistic skin texture, natural pores
12. Natural Color Grading
Avoids over-saturated colors.
Example:natural color grading, balanced tones
13. Film Grain
Adds subtle realism.
Example:subtle film grain, cinematic texture
14. HDR Look
Enhances dynamic range.
Example:HDR style, enhanced contrast
Modifiers like realistic skin texture and HDR style enhance photorealism. For research on high-resolution image generation using GANs, check out
This study on arXiv.
15. Realistic Shadows
Improves depth and grounding.
Example:realistic shadows, soft shadow edges
16. Global Illumination
Balances lighting across the image.
Example:global illumination, natural light spread
17. Natural Perspective
Prevents distortion.
Example:natural perspective, realistic proportions
18. DSLR Photography Style
Simulates professional camera output.
Example:DSLR photography style, professional lens
19. Close-Up Shot
Great for detail-focused images.
Example:close-up shot, macro detail
20. Clean Background
Keeps focus on the subject.
Example:clean background, minimal distractions
How to Combine Grok Prompt Modifiers Effectively
Instead of using one modifier, combine 3–5 relevant ones.
Example Prompt:
Close-up portrait of a woman, cinematic lighting, shallow depth of field, realistic skin texture, photorealistic, natural color grading
This approach produces balanced, professional results without overwhelming Grok.
Common Mistakes to Avoid
- Overloading prompts with too many modifiers
- Mixing conflicting styles (cartoon + photorealistic)
- Forgetting lighting or depth modifiers
- Using vague words like “nice” or “beautiful.”
When to Use These Grok Prompt Modifiers
These Grok prompt modifiers work best for:
- Portrait photography
- AI photo editing
- Product mockups
- Branding visuals
- Marketing images
- Creative art projects
For branding-specific use cases, you can also explore our Grok prompts for logo design and branding
guide.
Final Thoughts
Ultimately, mastering Grok prompt modifiers is the key to creating ultra-realistic AI images. By specifying lighting, texture, resolution, and depth, you provide Grok with clear instructions that yield consistent, professional results.
Start by experimenting with a few modifiers, then gradually refine your prompts. Over time, you’ll develop a prompt style that delivers exactly the visual quality you need.
For more tutorials, examples, and advanced techniques, don’t forget to explore the Grok resources linked throughout this guide.